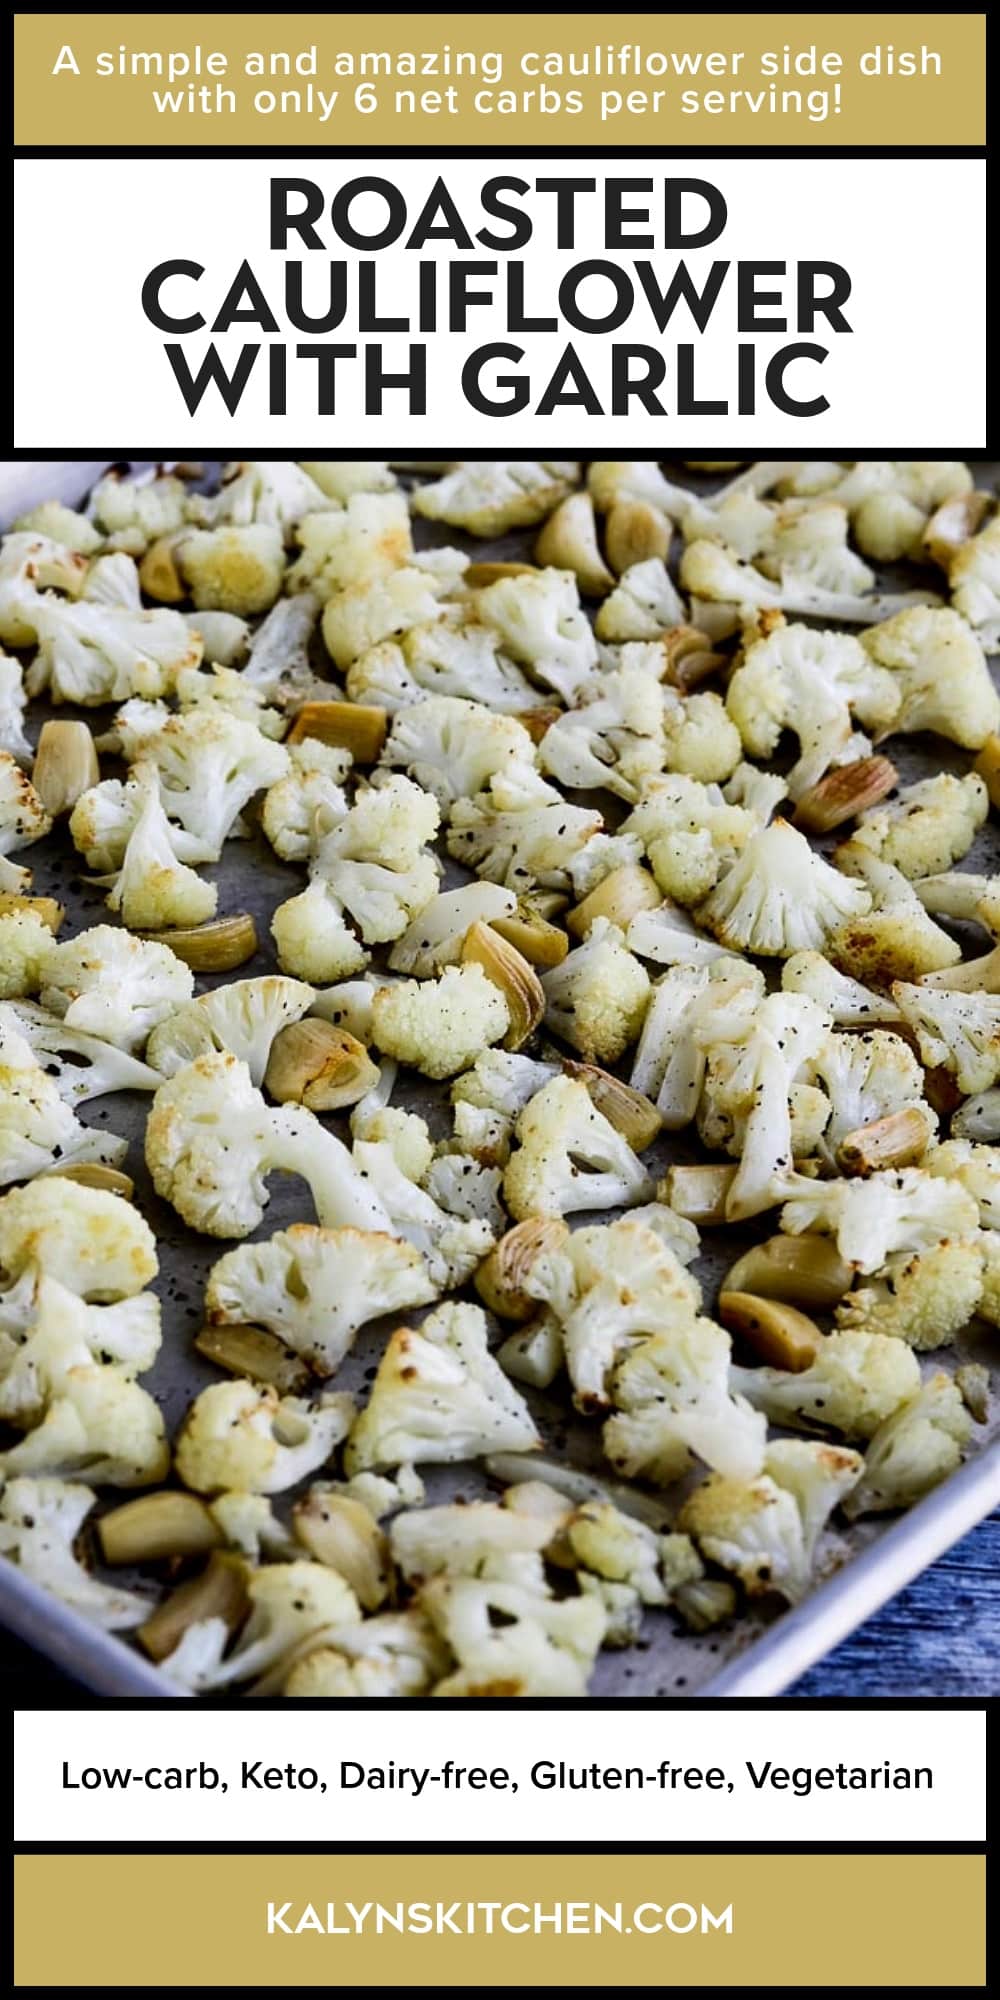
Roasted Cauliflower with Garlic
Roasted Cauliflower with Garlic is so delicious, and if you’ve ever roasted garlic you understand why it add so much flavor to cauliflower! And everyone who likes garlic and cauliflower is going to love this perfect cauliflower side dish that’s so tasty and easy to make!
PIN the Roasted Cauliflower with Garlic to try it later!
Roasted Cauliflower with Garlic is a simple idea based on the amazing flavor that comes from roasting whole garlic cloves until they’re sweet and delicious. I’ve shared a few recipes for vegetables roasted with garlic and every time I’ve talked about the amazing flavor of the roasted garlic!
Recently when we decided to update this recipe to get better photos, we made it with roasted whole garlic cloves, and what a great idea that was! And if you buy pre-peeled garlic cloves this recipe is so easy to make! If you haven’t tried roasting cauliflower with garlic, I think this recipe is absolutely a must try! And it’s definitely time to start using the oven, so let the roasted vegetable love begin!
Email This Recipe To Me!
What ingredients do you need?
(This is only a list of ingredients; please scroll down for complete printable recipe. Or if you use the JUMP TO RECIPE link at the top of the page, it will take you directly to the complete recipe with ingredient amounts.)
- cauliflower
- garlic cloves (Garlic cloves that come in a jar are fine for this.)
- good quality Olive Oil (affiliate link)
- salt and fresh-ground black pepper to taste
What makes Roasted Cauliflower with Garlic so good?
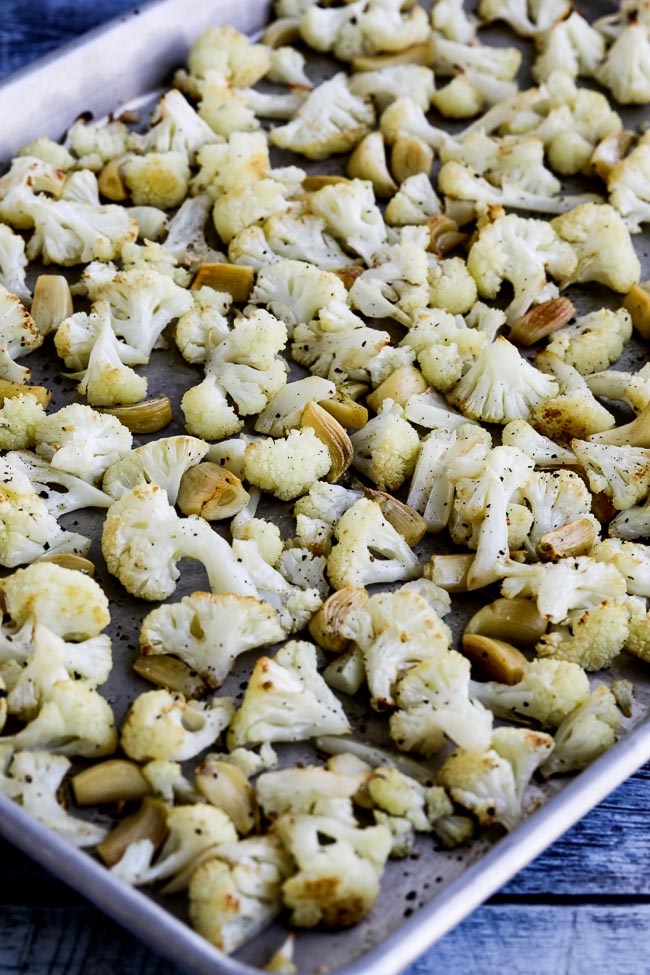
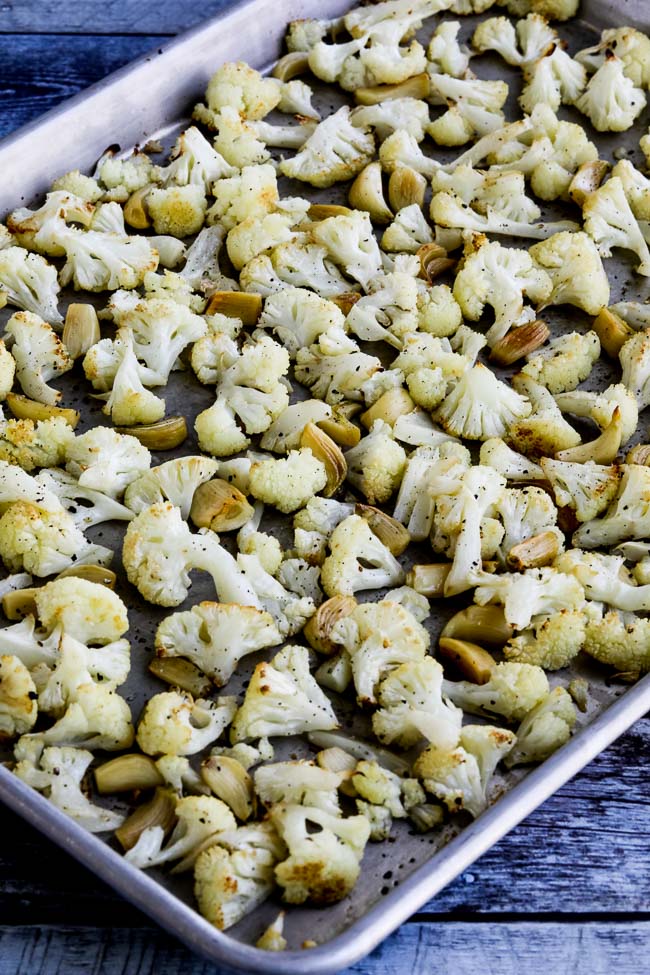
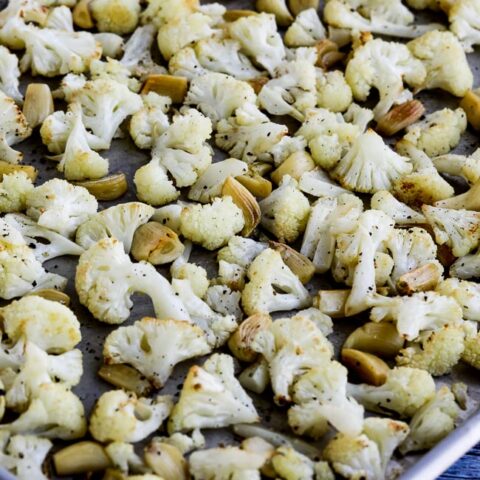
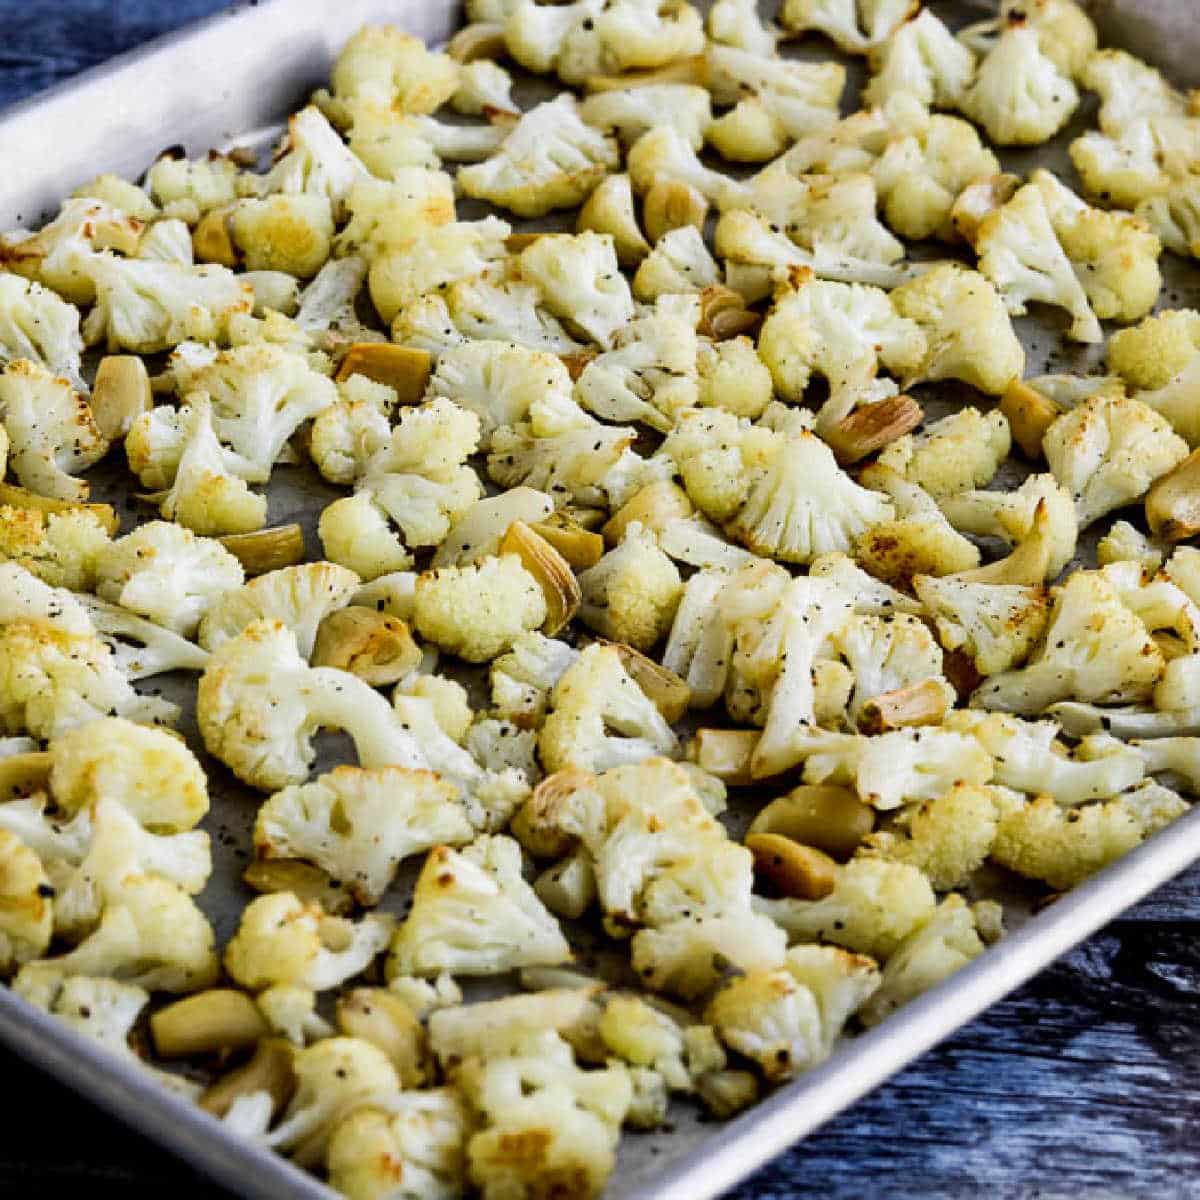
I love the way roasting at a high temperature brings out the flavor of vegetables, and roasted cauliflower gets a slightly nutty flavor that you don’t get from cauliflower that’s cooked in other ways. And in this recipe the flavor of the roasted garlic is such a bonus! Don’t be afraid to roast the cauliflower until it’s starting to get slightly browned on the edges; that will make the flavor even better!
How low in carbs is the Roasted Cauliflower with Garlic?
This amazing cauliflower side dish has only about 6 net carbs per serving.
How to make Roasted Cauliflower with Garlic:
(This is only a summary of the steps for the recipe; please scroll down for complete printable recipe. Or if you use the JUMP TO RECIPE link at the top of the page, it will take you directly to the complete recipe.)
- Preheat the oven to 425F/220C.
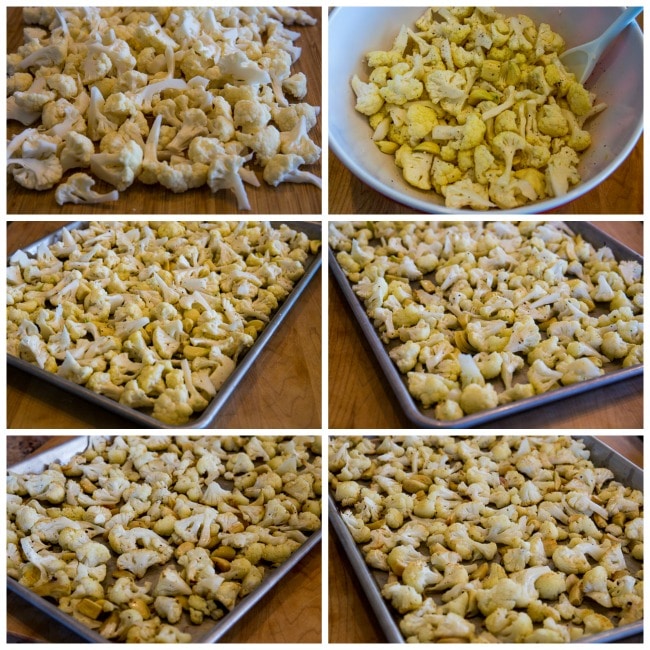
- Cut up a medium-large head of cauliflower into bite-sized pieces.
- Peel garlic cloves if you’re not using pre-peeled garlic from a jar.
- Toss the cauliflower and garlic cloves with olive oil, stirring until the garlic and the cauliflower are completely coated with oil.
- Spread the garlic and cauliflower out on a large baking sheet, in a single layer. (Use two baking sheets if you need to to keep it in a single layer; my cauliflower is a bit crowded on the baking sheet.)
- Roast for 40-45 minutes, turning several times until the garlic is starting to get barely brown and cauliflower is getting brown on the edges.
- Season the Roasted Cauliflower with Garlic with salt and fresh-ground black pepper to taste and serve hot.
- Some people like a squeeze of lemon juice on this as well!
Make it a Low-Carb Meal:
Roasted Cauliflower with Garlic would be delicious with one of these main dishes:
- Pork with Peanut Sauce
- Pork Tenderloin with Mustard Sauce
- Marinated Chicken Thighs
- Air Fryer Sausage and Peppers
- Grilled Cuban Flank Steak
More Roasted Vegetables with Garlic:
If you like the idea of roasting vegetables with garlic, try it with Broccoli, Asparagus, or Green Beans!
Roasted Cauliflower with Garlic
If you've had roasted garlic then you'll understand why roasting vegetables with garlic is such a good idea, and this Roasted Cauliflower with Garlic is so delicious!
Ingredients
- 1 head cauliflower, cut into bite-sized pieces
- 30 garlic cloves (Garlic cloves that come in a jar are fine for this.)
- 3 T good quality olive oil
- salt and fresh-ground black pepper to taste
Instructions
- Preheat the oven to 425F/220C. Spray a large baking sheet with non-stick spray (or use two baking sheets if your head of cauliflower is extra large.
- Cut up the head of cauliflower into bite-sized pieces.
- Peel garlic cloves if needed.
- Toss the cauliflower and garlic cloves with olive oil, stirring until the garlic and the cauliflower are all completely coated with oil.
- Spread the garlic and cauliflower out on a large baking sheet, in a single layer. (Use two baking sheets if you need to to keep it in a single layer.)
- Roast for 40-45 minutes, turning several times until the garlic is starting to get brown and cauliflower is getting brown on the edges.
- Season with salt and fresh-ground black pepper and serve hot.
Notes
This recipe was adapted from Roasted Cauliflower by my friend Alanna at A Veggie Venture and I think it's fun that this was the very first recipe Alanna posted on her veggie-centric blog! The updated version tested with help from Jake and Kara, and we all gobbled it up when it was done!
Nutrition Information
Yield
6Serving Size
1Amount Per Serving Calories 104Total Fat 7gSaturated Fat 1gUnsaturated Fat 6gCholesterol 0mgSodium 114mgCarbohydrates 9gFiber 3gSugar 2gProtein 3g
Nutrition information is automatically calculated by the Recipe Plug-In I am using. I am not a nutritionist and cannot guarantee 100% accuracy, since many variables affect those calculations.
Low-Carb Diet / Low-Glycemic Diet / South Beach Diet Suggestions:
Roasted Cauliflower with Garlic is a perfect side dish for any low-carb or Keto diet, and the recipe also works for any phase of the original South Beach Diet.
Find More Recipes Like This One:
Use Side Dishes for lots more tasty side dishes using cauliflower. Use the Diet Type Index to find recipes suitable for a specific eating plan. You might also like to follow Kalyn’s Kitchen on Pinterest, on Facebook, on Instagram, on TikTok, or on YouTube to see all the good recipes I’m sharing there.
Historical Notes for this Recipe:
The recipe for cauliflower that’s roasted with garlic was first posted in 2006! It was last updated with more information in 2025.
22 Comments on “Roasted Cauliflower with Garlic”
Can I make roasted cauliflower with frozen cauliflower?
I can’t imagine making this with frozen cauliflower. Since it’s already partially cooked, I don’t think the garlic will get done in the time it takes to cook the cauliflower. And you’d have to thaw it first so I am guessing it might be soggy.
If you do try it, I’d love to hear how it works.
Cindy I love that idea of topping cauliflower with all those other flavorful things!
Mmmm! I like to use roasted cauliflower as a substitute for potatoes. I have never tried it with fresh garlic! Must try! Have you ever had the hashbrowns at WaffleHouse, where they add all kinds of toppings to them? My favorite was hashbrowns with onions, bell pepper, tomatoes and ham. Now I do the same with the roasted cauliflower. I add the onions and peppers at the beginning of the roasting time, and add tomato and ham (or bacon bits!) at about the halfway point. The rest of the family adds cheese, too, but I can't eat dairy. I love garlic, so I am gonna hafta try this version!
-M, have not tried pureeing it, but I would imagine it would taste wonderful. Let us know if you try it.
Hey Kalyn! Have you ever pureed the roasted cauliflower? I’d like to serve it with meatloaf, so I think a mashed/pureed version would be better. Thanks!
My favorite variation: to toss in some capers, chopped olives and a spritz of lemon juice at the end!
This caulflower is amazing. I have made it for about 6 months now and everyone eats it – from my husband all the way down to my toddler . It also is a hit at dinner parties.
Hey I’m closely following your posts. They are really interesting…..keep up the good work!!!
Biggles, hmmmm. Adding the flavor after. Have to give that some thought.
Alanna, amazing that this was your first post.
Cookiecrumb, my brother found the wonderful beans. He’s amazing. I’m thinking the darker the cauliflower (up to a point) the more toasty it will taste. Let me know if you try the longer time.
Aria, it was fabulous, if I do say so. (Well of course I can say so, it’s Alanna’s recipe!)
mmmmyes, roasted cauliflour is so good!!!
Hey, cool beans! (Your banner.)
I think the color of your roasted cauliflower looks fine, but if Alanna’s pushing for an even darker color, maybe I’ll just have to get brave and try.
It’s so funny to see the unassuming “Day One” of A Veggie Venture up in lights at Kalyn’s Kitchen … that’s something like 450 vegetables ago and low-carb without even trying! I haven’t made a tray yet this year, but will check timing for the browning aka caramelization. Thanks for making this! ; – )
Hey Kalyn,
I’m as surprised as you. Cauliflower is like meat. It takes intense heat while cooking and can hold a staggering array of spices & herbs.
After playing with it for the last year, I get the best results by adding flavors afterwards. Except for the curry version, that was good too!
Biggles
Bill, I like cauliflower most any way. One of my faves is Cauliflower Fried in Butter, an old Frugal Gourmet recipe.
Kitarra, I would have kept the garlic whole, but I didn’t have any big garlic cloves.
Sher, never grown cauliflower. I bet it’s wonderful.
Scott, I think veggies are great.
Christine, your combination sounds great.
W_P, me too!
Biggles, who would imagined you’d become vegetarian for a meal?
Hey,
I recently did a post about roasting cauliflower and realized there’s very little you can’t do to make it a wonderful dish or an entire meal. I do mine at 450 for 30 minutes. And this last time just did onions, mushrooms and the cauliflower. It was so good it was all I had for dinner. That’s saying something coming from me. No meat?
Biggles
This cauliflower dish lokks absolutely yummy… I love cauliflower!
Yum! Great recipe. I love roasted cauliflower and I’d already decided to roast it tonight along with broccoli, leeks, a few carrots and garlic to accompany lamb chops. Post coming soon…
Lovely. Aren’t vegetables underused in the kitchen these days? The always have to “accompany” something, but this is delicious on it’s own.
We’re great fans of cauliflower in my house–and I just planted some. So, this will be on my table for sure!
This is the BEST way to make cauliflower! Though I keep my garlic whole. It provides a subtle garlic flavor and you can eat the whole soft cloves at the end. I also make it with different kinds of oils. My favorite is hazelnut oil right now but I bet flax seed woul be good too!
This is about the only way I’ll eat cauliflower these days 😉