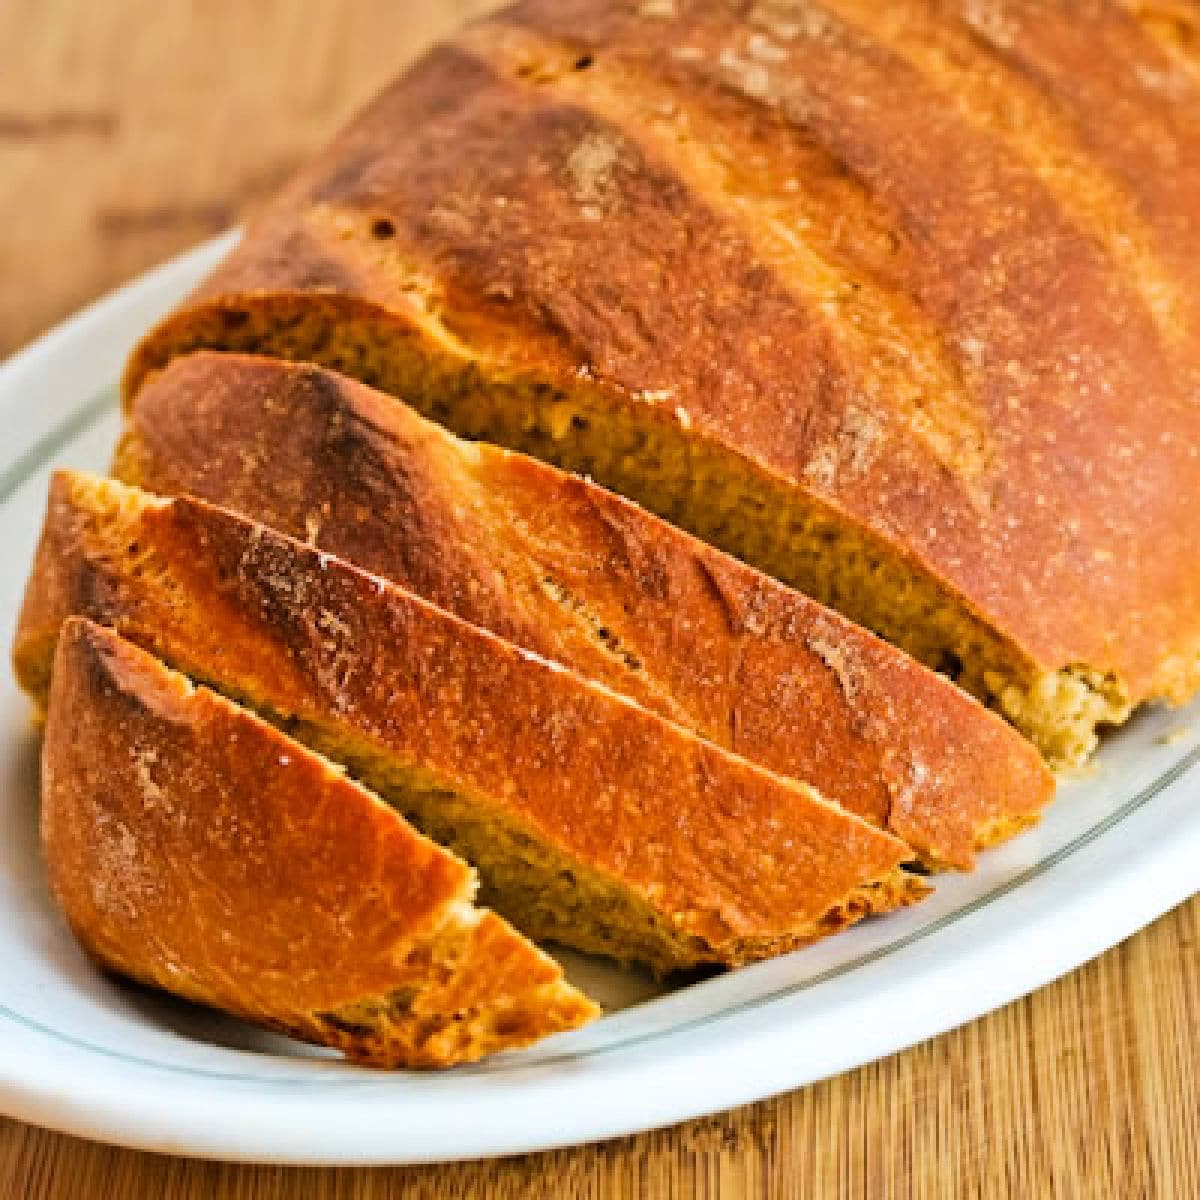
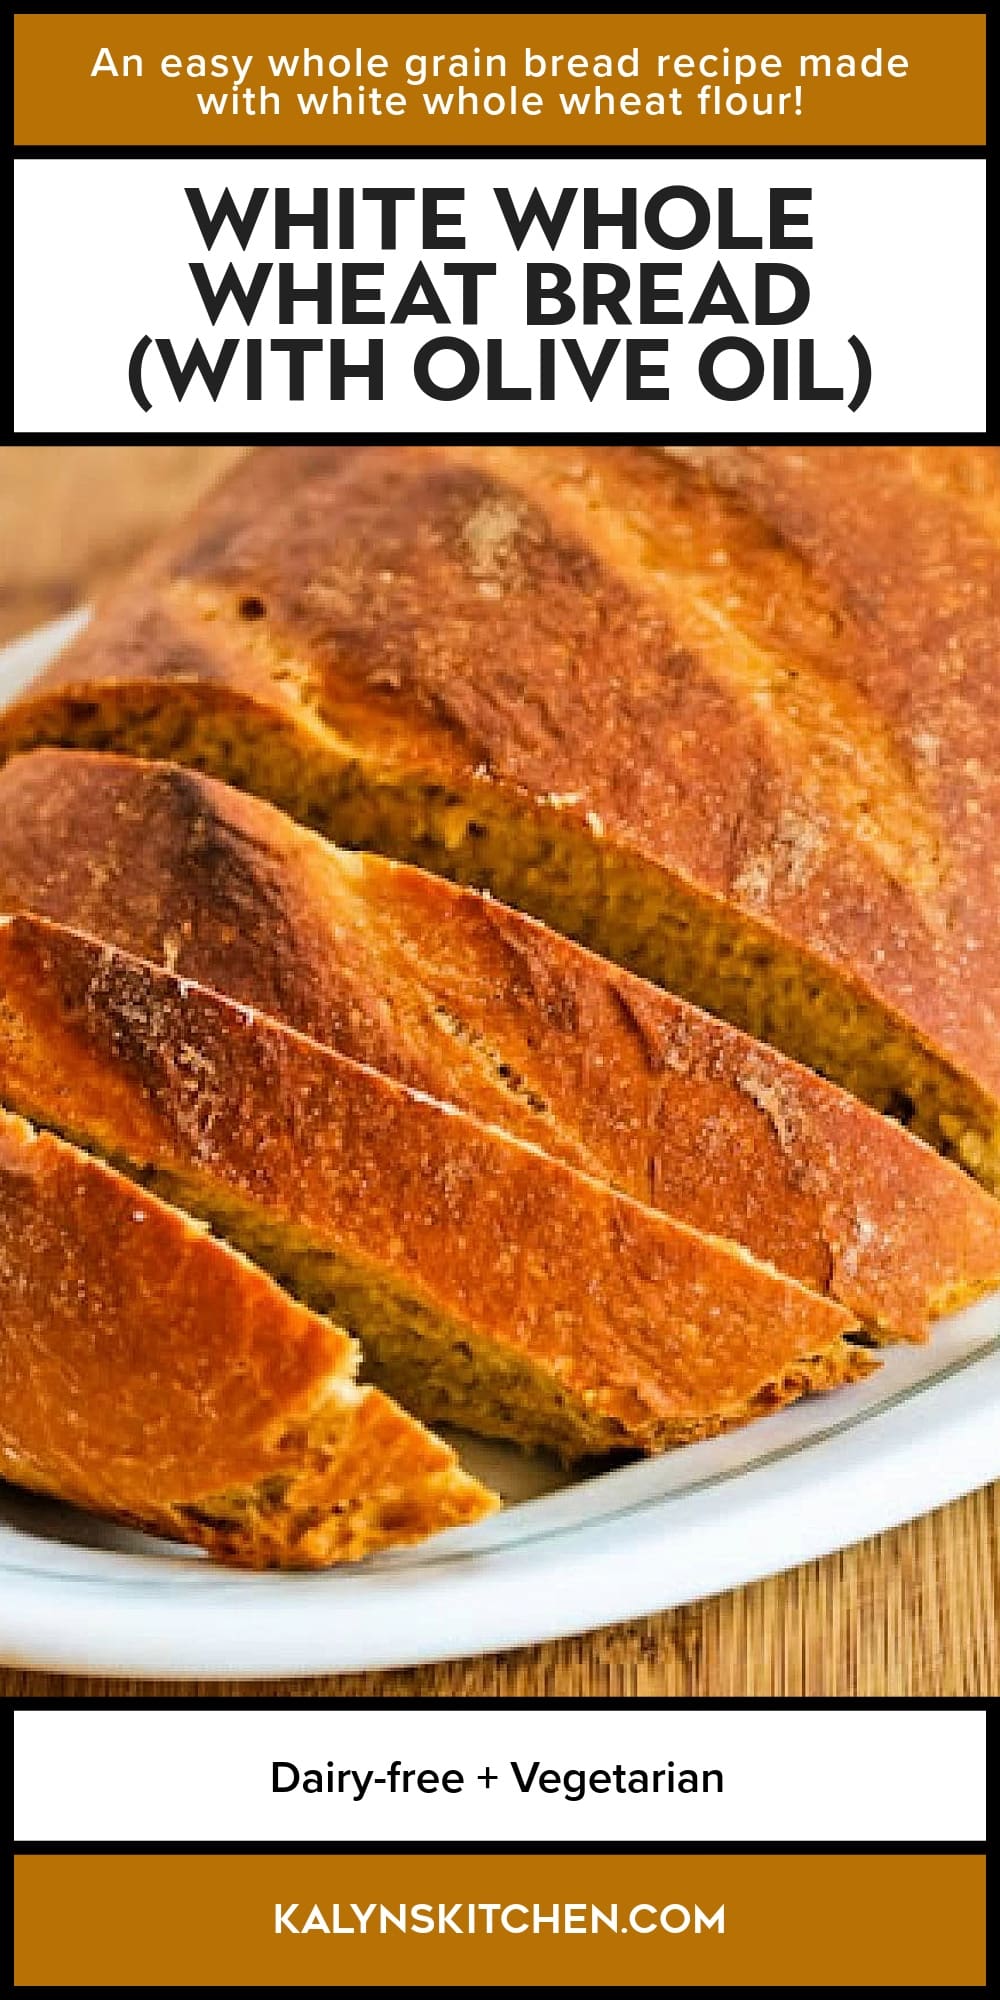
White Whole Wheat Bread (with Olive Oil)
This White Whole Wheat Bread (with Olive Oil) is perfect if you’re looking for a lighter bread that uses whole wheat flour! And if you’re someone who enjoys bread for an occasional treat, this bread isn’t a huge splurge on carbs.
PIN White Whole Wheat Bread to try it later!
White Whole Wheat Bread (with Olive Oil) is a recipe some people might be surprised to see on my carb-conscious recipe blog. But stay with me for a minute!
While it’s true that this white whole wheat bread bread isn’t super low in carbs, here’s the ingredient list: white whole wheat flour, yeast, salt, vital wheat gluten, olive oil, and water. This is a whole grain bread recipe for making bread at home and it’s easy to make as well!
And I think the olive oil gives this white whole wheat bread a delightful flavor, and I consider this a pretty healthy bread recipe. And if you’re someone who just has to have bread occasionally, it’s not too huge of a splurge in carbs. And I bet some readers of Kalyn’s Kitchen who are avoiding white flour will love this healthier way of making whole wheat bread.
Email This Recipe To Me!
What ingredients do you need?
(This is only a list of ingredients; please scroll down for complete printable recipe. Or if you use the JUMP TO RECIPE link at the top of the page, it will take you directly to the complete recipe with ingredient amounts.)
- White Whole Wheat Flour (affiliate link)
- yeast
- sea salt
- vital wheat gluten (affiliate link)
- water
- Olive Oil (affiliate link)
Where did I find the recipe for White Whole Wheat Bread?
This White Whole Wheat Bread recipe is from Healthy Bread in Five Minutes a Day (affiliate link) from Jeff Hertzberg and Zoe Francois. Jeff and Zoe wrote this book when fans asked for bread recipes with whole grains. (Full disclosure: I received this book from the publisher back when I used to accept books.)
What is White Whole Wheat Flour?
White Whole Wheat Flour is a whole grain flour that’s milled from the hard white wheat berry. Read more about white whole wheat flour and why you might like it even if you’re avoiding traditional white flour.
How high in carbs is the White Whole Wheat Bread (with Olive Oil)?
This recipe makes two loaves of bread. If you make each loaf into ten slices like I did, each slice has 14 net carbs and 4 grams of protein.
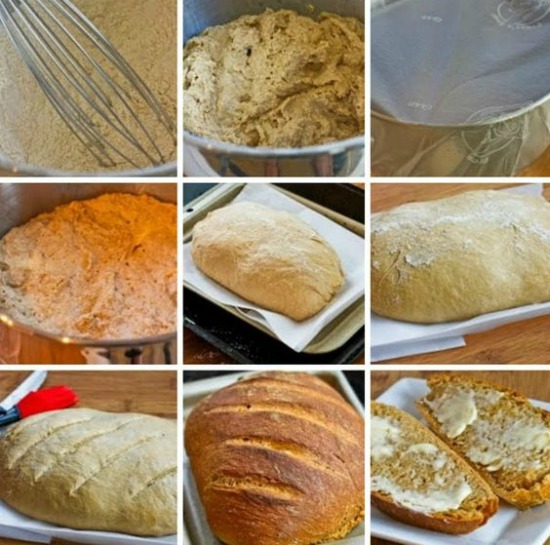
How to make White Whole Wheat Bread (with Olive Oil):
(This is only a summary of the steps for the recipe; please scroll down for complete printable recipe. Or if you use the JUMP TO RECIPE link at the top of the page, it will take you directly to the complete recipe.)
- White whole wheat flour is a whole-grain flour made from a lighter variety of wheat, and it has a less-assertive flavor than most whole wheat flours.
- Start by mixing flour, yeast, salt, and vital wheat gluten. And I’m mixing those ingredients in the bowl of my new KitchenAid stand mixer (affiliate link)! I resisted buying one for years, but finally succumbed and now I see why everyone who bakes loves their KitchenAid!
- I used the paddle attachment of the KitchenAid to mix the olive oil and water into the dry ingredients, but the book says you can mix it by hand as well. (Don’t use the dough hook, this bread is not supposed to be kneaded! The recipe is also not suitable for making in a bread machine for that reason.)
- Once the dough is mixed, cover it with something that’s not air tight and let it sit at room temperature until it rises and collapses or flattens out on top (or about 2 hours.)
- Here’s how my dough looked after 2 hours. Jeff and Zoe say the dough is easier to handle when it’s been chilled, and I need all the help I can get, so I put it in a plastic container with the lid not completely sealed and kept it in the fridge overnight. (Forgot to take a picture of the bread in the container, blogger error!)
- My oven is broken so I decided to try baking this in a toaster oven. Besides the sheet you use to bake the bread (or a baking stone, which I didn’t have), you need a container to pour water in to produce steam. This is the system I rigged up, with a roasting pan to hold the water, a little baking sheet for the bread, and some parchment paper.
- Sprinkle the surface of the dough with flour, remove a grapefruit-sized piece of dough, and put the rest back in the fridge for another baking day.
- Sprinkle the grapefruit-sized piece with flour again, and then fold under until you form a ball with a smooth top. You can stretch it out in a loaf-like shape like I did or keep it round. (This little baking pan is only 8.5 inches long, so this piece of dough is smaller than it looks in this photo.)
- The dough has to rest for 90 minutes, but I wanted to preheat the baking sheet (since I didn’t have a baking stone), so after 60 minutes, I slid the parchment off. You can see how the dough has expanded.
- When the oven is hot, brush the surface of the dough with water, then use a bread knife to cut slashes into the surface of the bread. I wasn’t very creative, but I’m sure I’ll get better as I make this more!
- I removed the heated pans and carefully slid the parchment paper holding the dough back on the baking sheet, then put it back in the oven and poured 3/4 cup water into the tray. (Recipe called for 1 cup water, but my little rigged set-up wouldn’t hold that much!)
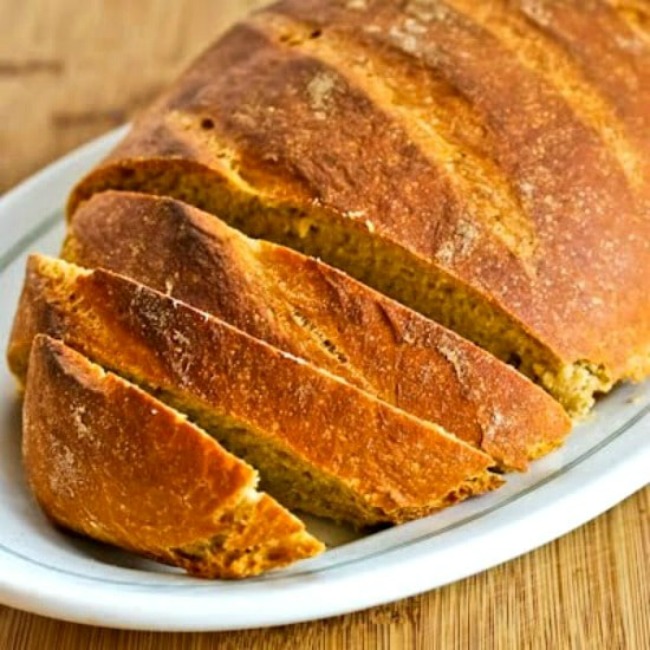
- Here’s how my White Whole Wheat Bread looked after I baked it for 30 minutes (removing the parchment paper for the last 10 minutes to brown the bottom.) Not bad for a complete amateur baker who didn’t have the right equipment. Credit goes to the book, not my bread-making skills.
More Recipes with White Whole Wheat Flour:

White Whole Wheat Bread (with Olive Oil)
This White Whole Wheat Bread is amazing, and this is easy to make if you want homemade bread that's made with whole grains! And using olive oil gave a wonderful flavor to the bread.
Ingredients
- 3 1/2 cups white whole wheat flour (or use whole wheat flour)
- 3/4 T yeast (I used active dry yeast, not instant)
- 3/4 T fine sea salt (original recipe used kosher salt, which I didn’t have. I increased the salt a little.)
- 2 T vital wheat gluten
- 1 3/4 cups lukewarm water
- 1/4 cup olive oil
Instructions
- In a large bowl (or the bowl of a stand mixer if you have one) mix together the White Whole Wheat Flour (affiliate link), yeast, salt, and vital wheat gluten (affiliate link).
- Then, using the low speed of mixer with the paddle attachment (or a large spoon) mix in the olive oil and water, until all the dry ingredients are incorporated. (The book says use wet hands to mix in all the flour if necessary if you don’t have a stand mixer.)
- Cover the dough (not air tight) and let sit at room temperature until the dough rises and collapses or flattens out on top (about two hours.) Then you can use the dough right away, or for easier handling, refrigerate for a few hours or as long as ten days.
- To prepare dough to bake, sprinkle the surface of the dough with flour, then remove a grapefruit sized piece of dough.
- Sprinkle with flour again, shape the dough into a ball by folding the sides under and stretching the top to a smooth surface. You can leave it as a ball or make more of a loaf shape like I did.
- Put dough on a pizza peel, parchment paper, or cookie sheet to rest. (I was supposed to cover it loosely, but I missed that part of the instructions!)
- To bake the bread you need a pizza stone or baking sheet with parchment paper or silicone mat, plus another metal baking dish to pour the water used to make steam. (The steam crisps the surface of the bread. You can put the metal dish anywhere that it won’t interfere with the bread rising, and in a regular oven I’d put it on a rack under the bread.)
- The dough needs to rest for 90 minutes, but after 60 minutes, begin preheating the oven to 450F/230C (and heat pizza stone if you have one. I didn’t have one so I heated the baking sheet.)
- After dough has rested for almost 90 minutes, use a pastry brush to brush the surface with water, then using a serrated knife, cut parallel slashes into the surface of the bread.
- Then slide the bread (and parchment paper if using) on to the hot pizza stone or baking sheet, and immediately pour 1 cup hot water into the other baking dish and shut the oven door. (My baking dish would only hold 3/4 cup water, but it seemed to work.)
- Bake bread for 30-35 minutes, or until firm and nicely browned. If you’re baking on parchment paper or silicone mat, remove them after 20 minutes so the bottom of the bread will brown. (I baked the loaf in the photos for exactly 30 minutes and it was perfectly done and even a tiny bit overly brown.)
- Try to force yourself to let this 100% White Whole Wheat Bread with Olive Oil cool before slicing and eating it!
Notes
This is half of original recipe for 100% Whole Wheat Bread with Olive Oil and makes enough dough for 2 loaves of bread or about 20 slices.
Recipe very slightly adapted by Kalyn from from Healthy Bread in Five Minutes a Day.
Nutrition Information
Yield
20Serving Size
1Amount Per Serving Calories 102Total Fat 3gSaturated Fat 0gTrans Fat 0gUnsaturated Fat 3gCholesterol 0mgSodium 264mgCarbohydrates 16gFiber 2gSugar 0gProtein 4g
Nutrition information is automatically calculated by the Recipe Plug-In I am using. I am not a nutritionist and cannot guarantee 100% accuracy, since many variables affect those calculations.
Low-Carb Diet / Low-Glycemic Diet / South Beach Diet Suggestions:
Of course this recipe for White Whole Wheat Bread with isn’t super low in carbs, but it’s a delicious treat at 14 net carbs per slice. Whole wheat bread is reserved for phase 2 or 3 of the original South Beach Diet, but every ingredient in this bread is SBD suitable.
Find More Recipes Like This One:
Check out Desserts and Baking for more breads and quick breads! Use the Diet Type Index to find recipes suitable for a specific eating plan. You might also like to follow Kalyn’s Kitchen on Pinterest, on Facebook, on Instagram, on TikTok, or on YouTube to see all the good recipes I’m sharing there.
Historical Notes for this Recipe:
This white whole wheat bread recipe was posted in 2010 when I was following the original South Beach Diet. It was last updated with more information in 2025.
50 Comments on “White Whole Wheat Bread (with Olive Oil)”
Hi there, wanting to make this 100% white whole wheat bread w/ olive oil. I even started it, and saw that you have 3/4 T yeast, and 3/4 T salt. To me, capital “T” means tablespoon, and small “t” means teaspoon. Please clarify this for me – which is it – 3/4 Tablespoon or 3/4 teaspoon? Thanks, and I look forward to the bread!
I checked the original printer-friendly recipe, my notebook where I write down the recipes, and even the book this recipe came from and both those measurements are T for tablespoon.
Notice there is a note that I increased the salt a little. The book had a section about salt and said they reduced the salt a little for healthy reason. I like salty flavors, so I increased the salt just slightly. If I had strictly followed the recipe it would have been 1/2 T salt (1.5 teaspoons). If you’re not a fan of salt so much, you could reduce to that amount but I wouldn’t go lower because the book also talks about how salt is needed to strengthen the gluten.
Hope that helps.
I haven't experimented with freezing the dough, so I don't know the best way to do that, but I think the dough will keep in the fridge for a few days.
Thank you for this post…
I was looking for how to make my own bread, and I have a breadmaker, but I didn't want to go that route.
I'm terrible when it comes to cooking knowledge.
But $4 to $5 whole wheat bread loaves, which tasted very bland, pushed me to explore a little more.
I made my own this weekend, and added a little honey, and I think I'm already addicted to making my own bread now.
Size of the loaf was smaller than expected, but I think that's a good thing – I need some better portion control aspects in this super-size-me world we live in.
The resulting bread was very dense, and I think it was supposed to be, right?
I have a question, though…
If I'm making a batch of dough that could be used for multiple loaves, do I separate those into balls to put in the freezer before that 2 hour rising time or after, or does it matter?
Thank you for introducing me to this, and I need to go now to buy my book 🙂
Courtney, so sorry it did not work for you. I think I will edit the recipe to say active dry yeast and warm water, but it still should have risen some even the way yo did it, unless you used ice cold water. Did you use the vital wheat gluten? I definitely don't think this would work without that.
You could try rolling the dough out and making breadsticks. Or stretch it out and make fry bread.
First of all, I love your blog, I have made quite a few things from it. However, I tried this and my bread still hasn't risen 3 hours later…
I bought the instant yeast because I didn't know what kind to buy until I read the comments, and I googled things and I guess maybe I was supposed to use warm water? I didn't know that…
This is the first time something hasn't worked out from your recipes but I'm kinda disappointed. Do you know anything I can use my lump of not risen dough for so I don't just have to throw it out?
I used active dry yeast.
Sorry if I missed it, but did you say what kind of yeast you used? Active dry or instant? Thanks.
I'm guessing this bread won't turn out without the vital wheat gluten, since I know Jeff and Zoe tested the recipes many times for the book. Not sure what you mean by "an ordinary mixer", I would probably just mix the dough by hand if you don't have a paddle attachment for your mixer (the recipe specifies not to use a dough hook.)
hi,
can the vital wheat gluten be taken out or be substituted? its not easily available for me.
also, will using an ordinary mixer not a paddle work for this recipe?
thanks for your time.
Heather, I just checked and the original recipe used 1 Tablespoon kosher salt to 7 cups of flour, with a note that you can increase or decrease the salt to taste, so you should be able to reduce the amount of salt. I was using sea salt, so maybe if you're using table salt that might make a difference.
I made this bread. It tasted great but it was super salty. I did the math and it came up to almost/over 400mg a sodium for a teeny little slice, which is about 3x more salty than store bought bread. I have to watch sodium and sugar/carbs both, so this won't do at all. It is possible that it's supposed to be 3/4 of a teaspoon rather than tablespoon? I just mixed a new batch using one teaspoon of fine sea salt but that still gives 187mg sodium for a tiny slice. I'm not sure if cutting the salt back that much will turn out well.
Angie, South Beach doesn't limit serving sizes, they just say that when you start adding things like bread back into your diet after phase one, monitor to make sure you are still losing weight. It's rather a small loaf in diameter, so I'm guessing most people could eat a couple of slices with no problems.
This bread looks wonderful!
How many slices would be a serving size?
Ashley, I love the book, bet you will too.
i just got this cookbook! the bread looks wonderful! can't wait to use my cookbook!!
Thanks Kalyn, I figured it out too: 3/4 Tablespoon is equal to 9/4 teaspoon. Thanks for the quick response.
Rose, I bet you will really enjoy the book.
The Harings, the T is for tablespoon. I have a 1/2 T measuring spoon, so I put a half T and then fill it half full for the the other 1/4 T. It's a little tricky due to the way I cut the original recipe in half!
Hey Kalyn,
I love your blog. Thank you for posting all the wonderful SBD friendly recipes it really has helped me to know what to eat and make on the SBD. For the recipe mentioned above is it T for Tablespoons or T for teaspoons? I can't seem to figure it out. As usually the Large T stands for Tablespoon for me but how do you get a 3/4 Tablespoon then? Help I thought I knew the basics of baking but I guess I am wrong.
Great job! I just got this book from them at the Foobuzz Festival! I cannot wait to start making nutritious bread for our family 🙂
Millie, I've seen it at several stores here too. Good luck, hope you like the bread!
This bread looks easy and delicious. I just finished mixing it, I just used my whisk and then formed the glob thing. You know what I didn't have any trouble finding the Vital Wheat Gluten, I shop at 2 different places and both had it. It's in a lil' box that has a mill on the front, hence the name Hodgson Mill 🙂
I hope mine tastes as good as yours looks!! Thanks
Linda, this won't work in a breadmaker because the whole idea of this bread is a dough that doesn't require kneading. There are some breadmaker recipes on the blog that are 100% whole wheat, just use the search bar.
Is there a way to modify this recipe for a breadmaker?
Janet, I am so sorry (I hate it when I mess up like this!) The first directions with the step by step photos are right. You should mix the dough and let it sit at room temperature covered (but not air tight) for a few hours ( or until it rises and collapses). At that point, you can use the dough immediately, or for easier handling it can be refrigerated for a few hours (or for as long as ten days.)
I'm so sorry! I have fixed it in the recipe, (I personally wouldn't add honey, but of course that's up to you.) I do recommend buying the book, because there are good explanations of the process and many, many recipes that look good.
Now I'm going to go read through the recipe again to make sure everything is correct now.
Kayln, In one place in your recipe you say to mix the dough and leave it at room temp for a few hours. In another you say to refrigerate the dough for a few hours after mixing. Which is it? I made it today and refrigerated it and I thought the end result was good but needed a little flavor boost. Honey?
I must apologize again for not keeping up on comments because (insert name of big internet company that I'm starting to hate) is still not sending some comments to my e-mail.) Monica, even though your comment shows up above, it just showed up on the blog dashboard today (Blogger inserts them at the time they are left, no matter what order they're published.) Sorry if it seemed like I was ignoring you. To answer your question, I don't think you can make it without the vital wheat gluten. Since the bread isn't kneaded, I think you need that to get it to rise.
Amanda, I did have some for breakfast yesterday; we're channeling each other.
Maria, I'm loving the KitchenAid, and yes, love the book!
Tobias, that's the beauty of this book. You mix the dough (enough for 4 loaves if you don't cut the recipe in half like I did) and then you can bake it over 10 days. Only takes 5 minutes prep time.
Sharon, thanks. I agree, whole grains are great.
Alfinky, have not tried that but will look for it.
This looks so good, Kalyn. I see here that you used Land o Lakes spread. You are a Kroeger person, ours is Ralph's here in Los Angeles, have you tried Brummel and Brown spread made w/ yogurt? http://brummelandbrown.com/product1.aspx
I like it and seems to be the best choice for those who are trying to get lean, like me!-al
I am a big fan of your website and excited to try this bread recipe! I think whole grains are so important in a diet and I’ve swapped out refined carbs for whole grains. Here are some recipes you might be interested in seeing that have whole grains and are very tasty: http://www.shar-on-nutrition.com/?p=362
Feel free to comment! 🙂
I wish I had more time to bake.
I love this bread/book. It is so easy. I am glad you got a Kitchenaid. Enjoy:)
soooooo delicious! looks like you got an amazing crust on that loaf! mmm i think that would be a delightful breakfast. wish i had a piece right about now! 🙂
Chelsey and Not So Perfect Housewife, I was writing my reply at the same time you were leaving your comments, didn't mean to ignore you! Thanks for the nice feedback.
Frieda, my oven has been broken for quite a while. Seriously thinking about getting a new Viking stove! Loved this healthy bread!
Nina, I'm guessing if you use white whole wheat flour you can sneak this one past the kids.
Chriesi and Joanne, thanks!
Jana, when you make the dough, it's more than you need for one piece of bread. You remove a grape-fruit sized piece of dough, which is how much you need for a loaf, and put the rest back in the fridge for another day.
Lea Ann, use the PADDLE hook, not the dough hook. This bread isn't supposed to be kneaded.
Andrea, who knew I would love the KitchenAid so much!
Green Grandma, this bread isn't suitable for a bread machine, since it doesn't require kneading. (I have a bread machine and there are some breadmaker recipes on the blog, just use the search bar.)
Dara, I loved the bread. I got Vital wheat gluten at whole foods, and I think Smiths Marketplace has it too in the nutrition section (by the Bob's Red Mill stuff.)
Ramona, interesting. Didn't know that would work.
Nate-n-Annie, good luck finding one! (Can I help with that?)
I think you can substitute with Xanthan gum 1/2 teaspoon per cup of flour.
Thanks for sharing that; I've never used it but might be worth a try for those who can't find Vital Wheat Gluten.
What beautiful looking bread. I can't wait to try it!
I was just stopping by via Foodblogs.com. What a great blog you have here. Can't wait to come back and visit again.
Have a blessed day!
The bread looks amazing. I have been cooking with oat flour for my family to avoid the 'wheaty' taste of whole wheat flour. I will have to find some of this white whole wheat flour…Love getting in those whole grains!
Why does the bread need extra gluten? I'm not sure I can find it and I wonder if I can make the recipe without the 2 T of vital wheat gluten you mention.
The KitchenAid was one of the indispensable pieces of equipment in our kitchen. We even brought it with us to Malaysia — just couldn't part with it. But now we have to find a 240V-110V transformer that can handle the Amps that our mixer needs.
I make this bread every week for my mother. She has a problem with the vital gluten so I just let the dough sit in my microwave(off of course) for 24 hours and it is light and fluffy in the end just like this recipe. Excellent and easy. Thanks for posting.
Fantastic, Kalyn! I have been hearing so much about Zoe's book and am very excited to try this whole wheat bread. Well done on your toaster oven adaptations. Where did you find the vital wheat gluten?
The bread looks divine. I'm wondering if you can you a bread maker to make it easier and faster? Found a great practically new one at our local Salvation Army Thrift Store! Any suggestions?
Isn't the KitchenAid mixer a miracle tool? I know we aren't supposed to love material things, but I do love my KitchenAid. 🙂 And your bread looks beautiful!
I'm getting a KitchenAid Mixer for Christmas. I'm saving this recipe and can't wait to use that dough hook!
The bread looks great. But maybe I missed something? What is the grapefruit-sized piece of dough removed for?
That bread looks wonderful! I never would have thought that bread baking could be so easy. I'm quite impressed.
What a beautiful bread!
My children sometimes struggle with a real coarse wholewheat bread. This bread seems light and still wholesome which would be perfect for them. Thx for sharing!!
That bread is absolutely beautiful ~ You will love your KitchenAid mixer…I'm sorry to hear that your oven is broken! I'm glad to hear that this whole wheat bread is healthy~